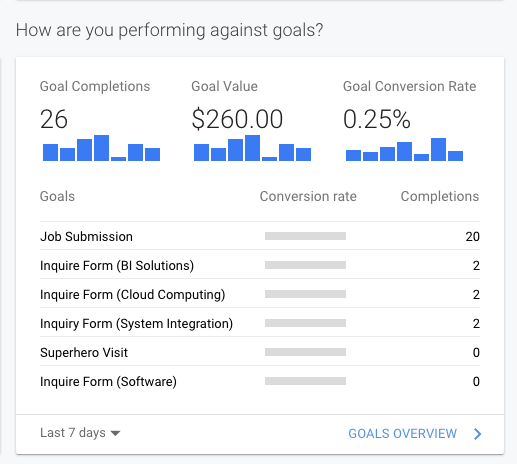
Do you want to track all Contact Form 7 submissions and see how well your website is performing? Would you like the metrics to be available inside Google Analytics, triggering goals, and assigning dollar values?
With this guide, you can.
Correctly tracking the performance of views, conversions, and conversions rates you can increase your marketing output.
Set-up Google Tag Manager
The first stage is setting up Google Tag Manager. We’re going to assume you have already done this. If you haven’t, Google Tag Manager is the most efficient way to manage Google properties in your site.
Simply create an account, add the Tag Manager code to your website, and link all your Google properties.
What Values Do I Pick Inside GTM?
Google Tag Manager can look a bit daunting if it’s your first time, using it. But honestly, once you understand the values, you will see that it’s a dawdle.
To do this, follow these steps:
- Log in to Google Tag Manager
- Make sure you are in the correct workspace.
- Click New Tag.
- Give your tag a name.
- Under Tag Configuration, click Edit.
- Click Google Analytics as the tag type.
Tag Manager requires two things, 1. A Tag: this is the property you want to connect with. In our instance Google Analytics. The second required element is a trigger, this is an element you want to track. In our instance, it’s a form submission.
Configure a Tag
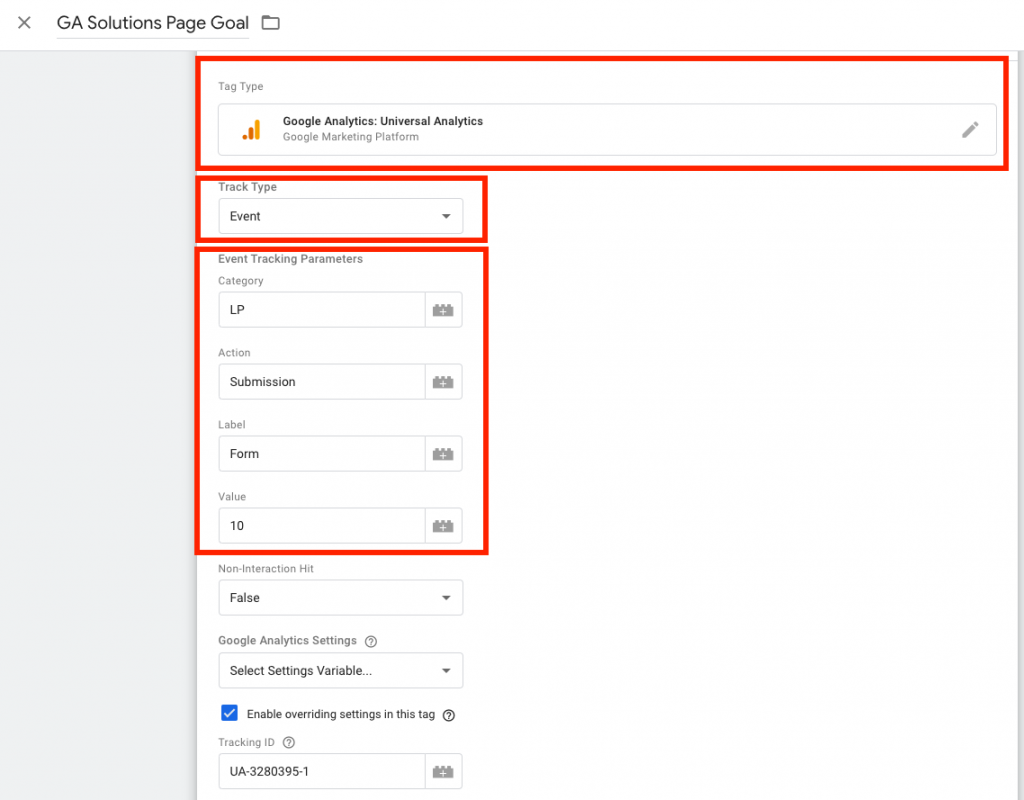
Tag Type: Google Analytics, as this is where we want to send our tracking to.
Track Type: This is the type of action you would like to track. In our instance, it’s an event (the event of submitting a form).
Event Tracking Parameters: This is the information we are going to use to tie our submission event to our Google Analytics Goals. You will see at the end of this article where to put this.
Category: LP for Landing Page (but can be named anything).
Action: The type of action that will occur.
Label: The element we are tracking.
Value: The monetary value we are giving to each submission.


Configure a Trigger
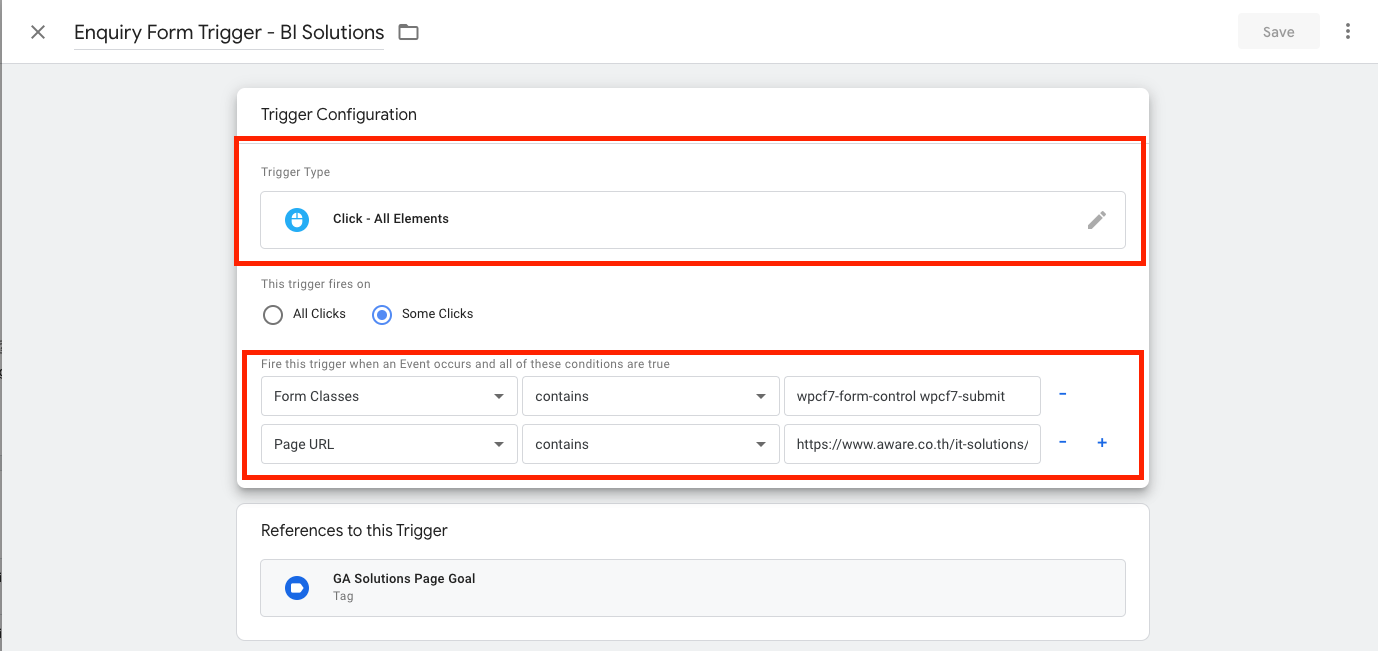
The Trigger Type is the action you want the user to take.
In our instance, we are using “Click – All Elements” – as we want to track the action of a *click* on a submission. You can track many variants of triggers, including views, scrolls, and loads depending on the action you want to track.
Form Classes: This is the most important part, you are telling Google Tag Manager what code you want to track. “wpcf-form-control wpcf7-submit” is the default for Contact Form 7, but if you want to see the class name of your form inspect your webpage inside Google Chrome and hover over the submission button. It should look like this.
Page URL: This is the page where the action happens.


Set Up Google Analytics Goals
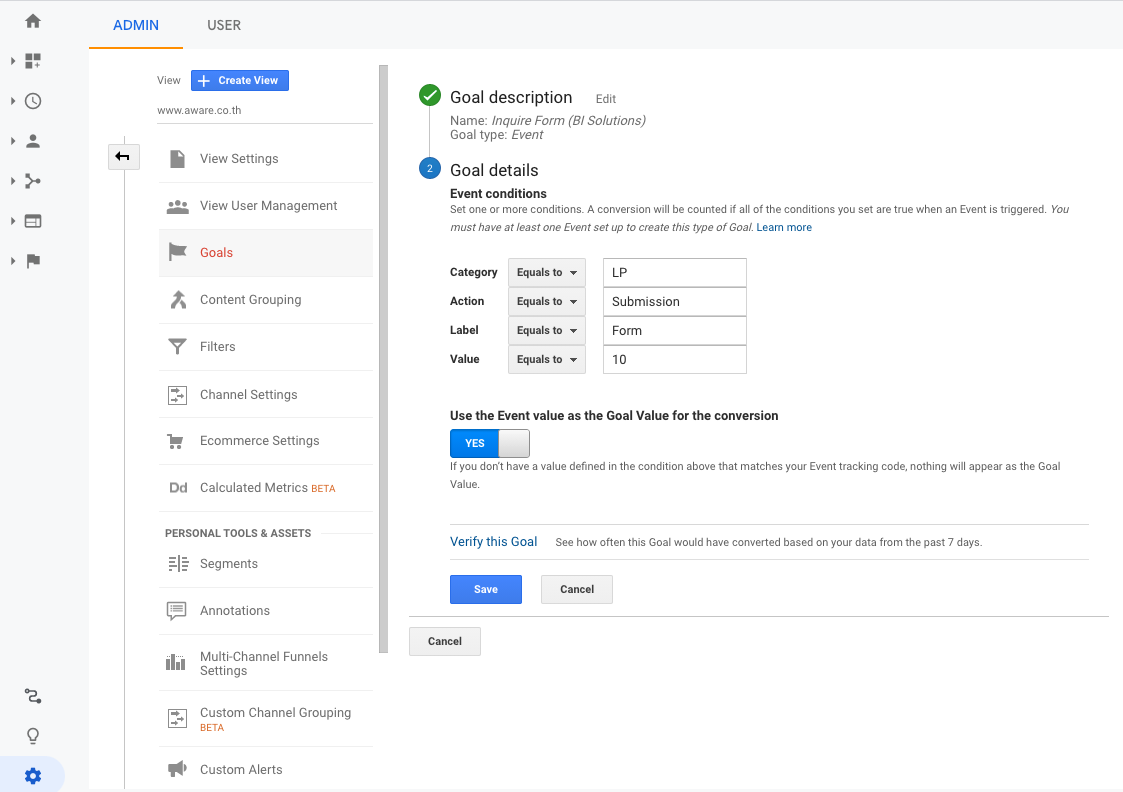
Go to the Google Analytics admin section and set-up Goals. The Goal Description – this is how you want the goal to be shown in your dashboard. You can see our Goal Description here.
Goal Details: The event detail should match the same information that you have inside the Google Tag Manager Tag. Then click save. Note, some goals can take 24 hours to register in your Google Analytics.


In Conclusion
By following the above guide you should now have your Contact Form 7 tracked inside Google Analytics as Goals.


Need Help With Your Online Marketing?
Aware can get help supercharge your business, increase revenue, and reach new customers.
Let Aware manage the digital marketing for your business today!
Digital Marketing Manager at Aware Group: Working his way through the world of technology and Thailand as best as he can. Happy to contribute to other tech publications.